From ‘Ailsa Craig’ to ‘Big Daddy’, home-grown Seed Pantry tomatoes are truly the biggest ‘Gardeners delight’ of the summer season. Do a little dance and try out our tomato salsa recipe with your fresh, home-grown goodies.
This tomato salsa recipe is great alongside scrambled eggs, omelettes and frittatas, in tacos or as part of a summer tapas spread for outdoor dining in the summer sun!
Ingredients:
– 500g ripe tomatoes, diced – ½-1 red onion, finely diced – 1-2 tablespoons of capers – A teaspoon of lemon juice – 2 tablespoons of rapeseed or olive oil – A handful of parsley and mint, or coriander, chopped – A pinch of sugar – A good pinch of sea salt and black pepper Optional – ½-1 garlic clove, finely diced
How to do it
Finely chop the tomatoes, red onion, garlic (if using) and combine in a large bowl.
Squeeze in the lemon juice and add 2 tablespoons of oil, season with salt and pepper and add the sugar.
Add the chopped herbs, stalks and all, to the salsa and toss lightly.
Serve right away or cover and set aside to allow the flavours to develop.
Variations
Try replacing the capers with 2 fresh jalapeño or green chilli peppers, deseeded and finely chopped, and substitute lemon juice for lime.
Ready to grow your own? You can find more vegetable seeds on the Seed Pantry website here.
The Seed Pantry team 🌼
#SeedPantryGrowClub
WIN a lucky-dip addition to your next box by sharing your plant pictures with us on Instagram. Use the hashtag #SeedPantryGrowClub or tag us @seedpantry to enter.
Subscribe to the Grow Club box for flowers, food and herb seeds ready to sow each month… Curious? Come check out all of this month’s options!
Getting to know your plants is key! They’ll tell you when they’re happy and when they’re not, so look out for the following signs of a thirsty plant;
Less than expected production of foliage, fruits or flowers.
Leaves or stems that look dull, or are darker or even paler than usual.
Changes in leaf direction, they may droop downwards or start to curl at the edges.
Wilting, the leaves may turn brown and crispy in extreme cases.
Pots are lighter than usual, maybe they’re even blowing over in the wind?
Signs of powdery mildew (a white coating on leaves, stems and flowers).
Note: Be careful not to overwater, too much love can cause plant leaves to wilt or droop also when overwatered! – a balance is needed.
When should I water?
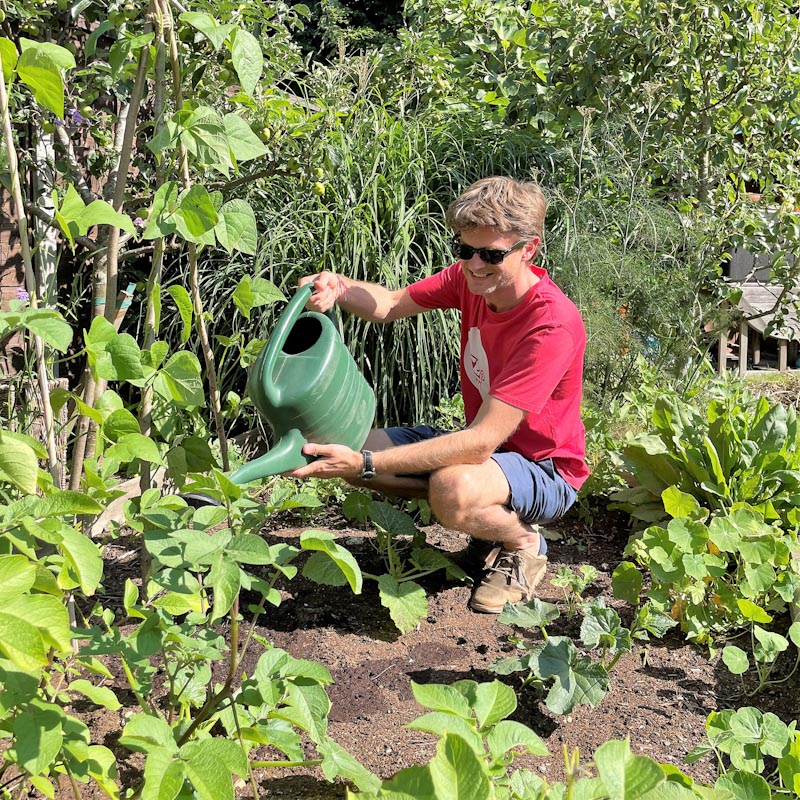
You may have heard that watering in the mid-day sun can cause the leaves to scorch. Even on the sunniest of days this is no more than a myth! Watering during the middle of the day will still be welcomed by any thirsty plant but is less efficient; more moisture will be lost to evaporation and strong winds are more common.
The best time to water is in the morning and will give your plants a good store of water to get through the days heat. Watering in the cooler evenings will also mean less water is lost to evaporation, however the surface of the soil and foliage will remain damp for longer which can encourage slugs and snails, and the plants may be more susceptible to fungal diseases.
It’s best to keep the soil damp, not wet! Roots need air in order for the plant to grow well.
It’s better to water thoroughly every now and again than it is to water lightly and frequently. By giving them a good soaking low down at the base of the plant (not all over the leaves) the water will get into the deeper soil where it’s needed by the root tips. Light watering can encourage the plants to grow roots closer to the soil’s surface make them more susceptible to drought.
How much water should I give my plants?
Plant Type How much water to give your plants depends on the requirements of individual plants; shade-loving plants and those from cooler, damper, climates will be less adapted to hot and dry weather so will need more water than sun lovers such as alpine plants. Those plants that are actively growing will also need more frequent watering than those that are dormant.
Soil Type If your soil is sandy or chalky you’ll need to water more frequently than soil with a high clay content as they’ll retain less moisture. You can water less heavily than you would need to for clay soil as any excess will drain freely.
Top tip
Digging organic matter into your soil will help it to retain more moisture.
Containers If your plants are in pots, the roots will be drinking any moisture from a smaller soil volume than if they were growing freely in the ground. The soil will dry out more quickly and will need watering more frequently. Try putting potted plants in shade to reduce water loss through evaporation, or water once or twice a day if in full sun and your plants are less drought tolerant.
Soil Dampness Water is absorbed by the root tips so don’t go by the dryness of the soil’s surface as a marker for when to water. Push a finger into the compost to knuckle depth; if the soil is damp you’re OK, if it’s dry, water.
Watering and caring for your plants is a lovely therapeutic activity, so enjoy.
The Seed Pantry team 🌼
#SeedPantryGrowClub
WIN a lucky-dip addition to your next box by sharing your plant pictures with us on Instagram. Use the hashtag #SeedPantryGrowClub or tag us @seedpantry to enter.
Subscribe to the Grow Club box for flowers, food and herb seeds ready to sow each month… Curious? Come check out all of this month’s options!
The wonderous florets of cauliflower, broccoli, calabrese and artichoke are only the beginning when it comes flowers we’ll happily nibble on! Familiar faces such as pansies and nasturtiums are wonderful adornments for cakes, salads and more. Why not give some of these more unusual edible flowers a whirl too?
Not all flowers are edible, some can even be poisonous, so stick to the ones on our list below or make sure you do your research thoroughly! Here are our top tips for choosing edible flowers safely:
A lot of flowers look very similar, so only eat flowers if you are certain they are edible.
In this guide the whole of each flower listed is edible, with the exception of calendula where only the petals can be eaten. Make sure you remove the calyx, pistil and stamens of these before consumption.
If you suffer from hay fever, pollen or plant allergies either remove the stamen from the flowers before eating or avoid entirely.
Avoid picking blooms from the side of the road or where they may have been sprayed with fertilisers or pesticides.
Calendula petals and leaves are great additions to summer salads!
The Seed Pantry team top edible flower picks
Calendula (pot marigold) – The petals add a lovely bright-orange dash to plant and cooking pots alike. Sprinkle over salads use in rice, where they bring a taste similar to saffron… for a fraction of the price! Be careful not to confuse them with marigolds (Tagetes species) which is best kept as a companion plant.
Viola – The pansy-like faces will bring a colourful, sweet and fragrant twist to salads. Thanks to their long flowering periods, they’ll grace dishes from mid-summer right through to winter. They’re also a stunning addition to baked goodies and desserts.
Pansies – Unlike violas, their taste is a quite savoury; slightly salty, peppery but fresh taste. Try adding them to cabbages, carrots and fish dishes in all their rainbowiness.
Borage – Eating these beautiful blue flowers is said to make us more courageous by stimulating adrenaline release! Tasting a little like cucumber they’re brilliant in salads or frozen into ice cubes for summertime Pimms. They also supposedly help us forget our troubles… which coincidentally is a rather great side-effect of Pimms too.
Nasturtiums – Curiously this super easy-to-grow flower is a cousin of the Brassica family. The young leaves, flowers and fresh seeds are edible and have a pleasant, sweet, peppery flavour. The leaves make a great pesto and the fresh seeds are super duper tasty when pickled like capers.
Cornflower – With a slightly spicy, clove-like flavour and subtle sweetness. Their blue petals look especially lovely mixed with calendula in summer dishes. They’re wonderful sprinkled over ice-cream like confetti too!
Sunflower – Not only do the large lemon-yellow petals look fab in salads, they also add a mild, nutty, bittersweet flavour. In fact, you can eat everything from root to leaf, sprout to stalk! Steam whole flower heads and eat them like artichokes, crunch on the celery-like stalks with hummus or peanut butter or steep the leaves for sunflower tea. After that, you can eat seed kernels raw or toasted… or share them with the birds!
Herb flowers – The flowers of most herbs are edible; you’ll find they taste very similar to the leaves but usually a little stronger or milder. Fennel, dill, thyme, oregano and chive flowers are all rather delightful.
Courgette –If you need easing-in to the idea of eating your floral friends try stuffing the flowers with cream cheese. You can also deep fry them, or simply steam and marvel at their peppery scrumptiousness.
Top tiPS For using edible flowers
Harvest young buds and flowers in the morning to keep their intense colours and flavours, before the midday sun can dry them out.
When harvesting edible flowers, make sure you wash them thoroughly before use. Dip them in a bowl of water and gently shake to remove any stubborn insects that may be hiding inside.
Flowers taste and look their best on the day of picking but you can pop them in the fridge in an airtight container for 2-3 days.
The Seed Pantry team 🌼
#SeedPantryGrowClub
WIN a lucky-dip addition to your next box by sharing your plant pictures with us on Instagram. Use the hashtag #SeedPantryGrowClub or tag us @seedpantry to enter.
Subscribe to the Grow Club box for flowers, food and herb seeds ready to sow each month… Curious? Come check out all of this month’s options!
Whether you haven’t a lot of space or prefer your vegetable crops close at hand, creating a container garden is a great way to grow your own food. Beetroot, Potatoes, Carrots, Herbs, Peas, Salad leaves, Peppers, Aubergines and Tomatoes are all great pot-dwellers – and it’s not too late to start planting! You can also plant edible flowers like Nasturtiums, Calendula or Violas to encourage beneficial insects and add colour or double up with companion planting some plants love growing in the same container! (We think tomatoes taste sweeter when they’re planted with basil)
What can I plant in my container garden?
The answer is… anything! Some vegetables, such as tomatoes and onions, are a little more delicate and should be started off in seed trays indoors as the seeds are at risk of rotting before being given the chance to sprout, but if you let them grow for up to 2 months they’ll happily be transplanted into outdoor containers. If you opt to grow beans, remember that they climb so lend them a stick for support.
Here’s our quick guide to create your own vegetable container garden!
1. Choose your container, and don’t be scared to get inventive! Anything from tin cans to old sinks will work – you may just need to drill/poke a few drainage holes. Aim for a depth and width of at least 45cm, although salads and herbs will thrive in containers as shallow as 15cm.
2. Fill your pot a couple of inches short of the top with multi-purpose compost.
3. If you are sowing your seeds directly into the container, scatter the seeds and cover with a thin layer of compost, about 2cm deep. If you started your seeds off indoors, prick out the seedlings and transplant into the compost (lift the seedlings carefully by the leaf as the stems bruise easily).
You can start off any of your Seed Pantry food seeds in recycled pots – simply transplant later on!
4. Give your seeds a good drink!
If you’re growing between April-September containers can dry out quickly, especially if the weather is good, so aim to water your plants 1-2 times every day. ☀️ During the winter months, reduce the watering schedule as plants won’t be expending as much energy for their growth. If it’s really cold either cover your plants or move them indoors to protect them from freezing.
The Seed Pantry team 🌼
#SeedPantryGrowClub
WIN a lucky-dip addition to your next box by sharing your plant pictures with us on Instagram. Use the hashtag #SeedPantryGrowClub or tag us @seedpantry to enter.
Subscribe to the Grow Club box for flowers, food and herb seeds ready to sow each month… Curious? Come check out all of this month’s options!
Enrol on a free Organic pest protection programme and claim a few hundred complimentary pollinators for your fruit and vegetable gardens with this handy guide.
Plants thrive in communities, some plants have mutual benefits, and some really don’t get on well at all! Here at Seed Pantry we’ve compiled an easy guide to companion planting. You’ll learn which plants make the best pot buddies and help you keep your home-grown Seed Pantry vegetables happy. 👨🌾
Plant
Companion
Why plant together?
Broccoli, Brussels sprouts, Cabbage, Cauliflower, Kale
Nasturtium
Cabbage white butterflies will happily lay their eggs on Nasturtium leaves. Once the eggs hatch, the caterpillars will nibble your Nasturtiums and not your crops!
To deter flea beetles, aphids, and to confuse carrot root fly/Onion fly, who find their host through scent. Keep the Mint in a pot if possible, as it quickly spreads and will smother your crops!
Carrot
Leek, Spring Onion, Onions
The smell of Leeks deters carrot root fly from Carrot, and the smell of Carrots deters Leek moth and Onion moth from Leeks and Onions!
Asparagus, Courgette, Tomatoes
Calendula (Pot Marigold)
Calendula is very attractive to pollinators as it’s long flowering period means it can provide nectar over the whole growing season. It can also repel Asparagus beetles and unwanted soil nematodes.
Aubergine, Lettuce, Pepper, Tomatoes
Basil
Basil is known to improve the flavour when grown with these vegetables. The scent also helps to deter aphids.
Tomatoes
French Marigold
The Marigold scent will help deter whitefly.
Tomatoes
Chives
The Onion smell will deter aphids.
Flowers
Mint, Chives, Thyme
These smelly plants will help deter aphids and blackfly from nibbling your blooms.
Runner Beans
Sweet Peas
Sweet Peas will attract pollinators to your Runner Bean flowers.
All vegetables
Tansy
The smell of Tansy deters ants.
All vegetables
Yarrow
Yarrow is a great ‘green manure’, use it to fertilise your vegetable plot by planting amongst your crops or composting it and adding as mulch.
Mint, Calendula and Nasturtiums (L-R) are all great companion plants!
Seed Pantry top tips and ideas to make the most of companion planting:
Create partial shade for shorter crops by planting alongside taller plants, for example peas or sweetcorn. Some plants, namely coriander, lettuce and spinach are prone to bolting in hot weather. This means that the plants produce a flowering stem before harvesting as a natural attempt to produce seeds and occurs when the plant is stressed (including in high temperatures).
Plant herbs throughout the plot, their strongly scented leaves will help repel the less useful of insects and their flowers will encourage pollinators.
Utilise your space! Planting fast-growing crops such as lettuce and radish between slower-growing crops like root vegetables and Brussels Sprouts will increase your yield per square inch. It will also help prevent weeds growing!
Encourage wildlife into your garden. Butterflies, moths, beetles, birds, bats and millions of other insects all play an important role in keeping your garden happy. Sow lots of wildlife friendly seeds to bring natural predators that will help keep slugs and aphids at bay, to encourage pollinating insects, or simply to bring a little bit of life into your space.
With these tips in hand, you can grow an amazing variety of colourful veg you can grow from seed. Most importantly, you’ll be bringing better nutrition and outstanding homegrown flavour to the table all year round using companion planting!
Seed Pantry Team 🌼
#SeedPantryGrowClub
WIN a lucky-dip addition to your next box by sharing your plant pictures with us on Instagram. Use the hashtag #SeedPantryGrowClub or tag us @seedpantry to enter.
Subscribe to the Grow Club box for flowers, food and herb seeds ready to sow each month… Curious? Come check out all of this month’s options!
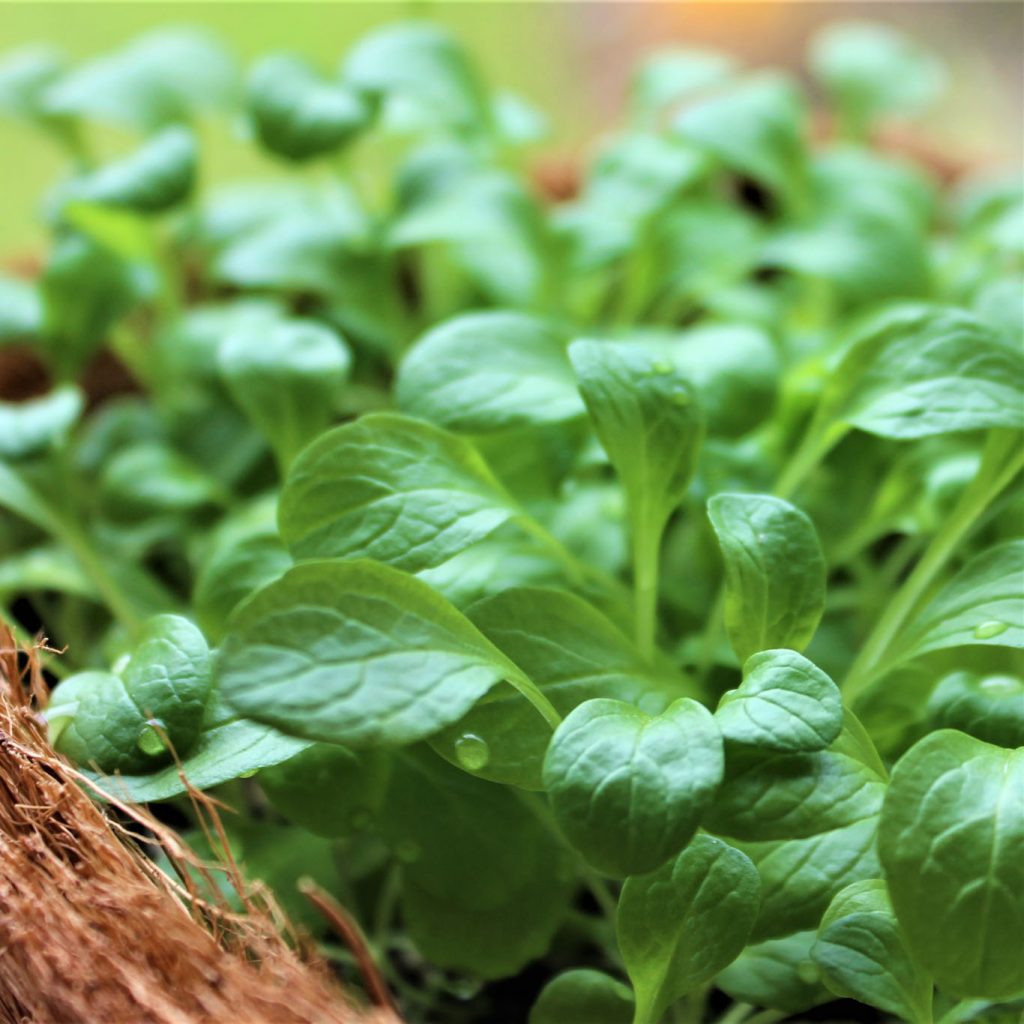
Grow micro-greens at home with this easy guide! These teeny leaves are packed with flavour, are rich in potassium, iron, zinc, magnesium and copper. Grow them at home with this Seed Pantry guide. 🤩
Micro-greens is a fancy word for any leaves harvested from the seedlings of leafy salad greens, like rocket and pak choi, or herbs, like basil and coriander. You’ll find plenty of choice in the Seed Pantry food seeds range or in your monthly Grow Club boxes that are suitable, brassicas, salads, sunflowers… the shoots of broad beans, peas, as well as root crops such as radish and carrot are also delicious!
You can grow all micro-greens in the same way, sown into a compost and placed in a sunny windowsill indoors – all year round! Grown in just about anything, from seed trays to old yoghurt pots, they’ll be ready to harvest in just 1-2 weeks. If you plant seeds every few days then you’ll have a supply of tender shoots right the way through winter, so take a leaf out of Seed Pantry’s book and add a bonanza of vitamins, antioxidants and minerals such as iron, folic acid and potassium to your meals!
Which seeds should I sow?
Radish: Quick and easy to grow, the pretty red stems of radish shoots will add colour to your salads as well as a peppery kick. Try them in egg sandwiches and stir fries.
Harvest: 7 days
Spinach: These mild, nutrient packed leaves are ideal for salads, or stirred into a risotto. Tastes brilliant in an omelette with micro broccoli.
Harvest: 10 days
Beetroot: Their red-stemmed leaves add a splash of colour and a mild, earthy flavour to leafy salads. Delicious when sprinkled over grilled fish.
Harvest: 10 days
Mustards: Varieties such as mizuna, mibuna and mustard red frills all pack a spicy punch. The pretty, frilly or red-leaved varieties to add a sprinkling of interest to your stir-fry.
Harvest: 10 days
Basil: Much easier to grow than the adult plant, these highly flavoured micro-greens can be used in exactly the same way. Look out for purple varieties, such as the Seed Pantry Basil ‘rubin’ for extra colour.
Harvest: 10 days
Pea shoots: Tasting just like fresh peas, these sweet little tendrils are good in salads and stir fries, and they look lovely!
Harvest: 14 days
Sunflower shoots: With a slightly nutty taste and a pleasing crunch, sunflower shoots will make a great addition to almost any salad.
Harvest: 14 days
Coriander: A little slow to germinate, but these tiny flavour-packed leaves are well worth the rate. Fantastic as a garnish for curries, noodles and stir fries.
Harvest: 14 days
How to do it
Cover the bottom of your container with an inch or two of compost, firming it lightly with your hand.
Scatter a dense layer of seeds, evenly spaced, over the op of the soil; try to avoid clumps of seeds.
Place your tray on a windowsill and keep them lightly watered using a mister or a fine watering can rose.
Your greens should be ready to harvest in about a week, although it’ll be a little slower in the winter. To harvest, either snip them with a pair of scissors or pull them up from the base of the stem.
The Seed Pantry team 🌼
#SeedPantryGrowClub
WIN a lucky-dip addition to your next box by sharing your plant pictures with us on Instagram. Use the hashtag #SeedPantryGrowClub or tag us @seedpantry to enter.
Subscribe to the Grow Club box for flowers, food and herb seeds ready to sow each month… Curious? Come check out all of this month’s options!
The Seed Pantry Spinach ‘Perpetual’ has certainly lived up to it’s name, but we’re not complaining! We’ve been devising new and delicious ways to use up our continuous supply of fresh leafy greens…including this spinach and onion puff pastry tart recipe!
– 350-400g spinach – 2 tbsp rapeseed or olive oil – 1 onion, diced – 1 garlic clove, chopped – 1 tsp fresh thyme or parsley, chopped – A packet of ready-rolled puff pastry – 75g cheese (cheddar and feta work brilliantly) – Freshly ground black pepper and a pinch of sea salt
How to do it
Preheat the oven to 180°C and grease a baking tray with a little of the oil.
– 350-400g Spinach
Tear out any tough stalks of Spinach and wash thoroughly. Place it into a saucepan with a tablespoon of water, cover and put over a medium heat to wilt the spinach for a few minutes. Drain and allow to cool.
When the Spinach has cooled enough to handle, squeeze as much liquid as possible out with your hands before chopping.
– 2 tbsp oil – 1 onion, diced – 1 garlic clove, chopped – 1 tsp thyme, parsley, or both
Heat the oil in a frying pan over a medium heat. Add the onion and cook for 10 minutes, stirring often. Add the garlic and cook for a further 3-4 minutes before adding the fresh herbs and chopped spinach. Remove the pan from the heat and season with salt and pepper to taste.
– Ready-made puff pastry
Roll out the puff pastry on a floured surface into a rectangle shape, about 4mm thick, before lifting onto the baking tray. Spread the spinach mix over the pastry (leave a small margin along the edges). Scatter over the cheese and place in the oven for 20-25 minutes or until the pastry is puffed and golden. Delicious!
Variations
Spinach and Pesto Tart
Try spreading a layer of Pesto over the puff pastry before piling on your spinach mixture, top with parmesan cheese and halved cherry tomatoes before cooking for a Mediterranean take! If you’ve been growing Basil in your Seed Pantry Grow Pod, you might even make the pesto yourself with our simple recipe!
Spinach and Ricotta Rolls
For a creamy dinner time favourite, add 75g each of ricotta and feta cheese to your spinach and onion mixture. Spread over the pastry, leaving a 2cm margin along one of the long edges and roll into a long sausage shape. Cut the roll into 4 equal pieces and pop into the oven for 20-25 minutes, or until golden.
WIN a lucky-dip addition to your next box by sharing your plant pictures with us on Instagram. Use the hashtag #SeedPantryGrowClub or tag us @seedpantry to enter.
Subscribe to the Grow Club box for flowers, food and herb seeds ready to sow each month… Curious? Come check out all of this month’s options!
So you’ve successfully grown basil in your Grow Pod 2… what better way to use it than making your own pesto? No fancy expensive ingredients needed; Here is our variation on the classic pesto recipe.
Don’t feel confined to pesto pasta! This versatile basil pesto recipe is great for sandwiches, added to salads, alongside plain-cooked fish, smeared over roasted vegetables, dolloped and stirred into soup or as a simple dip with crudités. You can use other herbs in pesto too, mint works brilliantly, as do stronger herbs such as sage or thyme, although these are best combined with parsley so they don’t overpower the more subtle flavours in the sauce. If you fancy giving other herbs a go, check out our Top 10 best herbs to start growing.
Ingredients:
– 50g breadcrumbs – 50g basil, leaves only (or 25g each Basil and Parsley) – 35g strong cheddar, grated – ½ garlic clove, peeled and chopped – 100-150ml rapeseed or olive oil – A good pinch of sea salt and black pepper
How to do it
Preheat the oven to 180°C/Gas Mark 4. Scatter the breadcrumbs on a baking tray and bake for about 10 minutes until dry and golden, checking them frequently towards the end as they burn quite quickly. Tip on to a plate and allow to cool.
Place the toasted breadcrumbs into a food processor, along with the basil, parsley, garlic and cheese and blitz to a paste.
With the machine running on low speed, slowly pour in the oil until you have a thick purée.
Scrape your pesto into a bowl, and season to taste with a little salt and pepper.
Variations
Try replacing the breadcrumbs with toasted pine nuts or walnuts. Walnuts can be lightly toasted in an oven preheated to 180°C/Gas mark 4 for 5-8 minutes. For the pine nuts, place them in a dry frying pan and toast over a medium heat for a few minutes, tossing frequently. One they’ve turned golden brown, remove them from the pan to stop them from burning and leave to cool.
WIN a lucky-dip addition to your next box by sharing your plant pictures with us on Instagram. Use the hashtag #SeedPantryGrowClub or tag us @seedpantry to enter.
Subscribe to the Grow Club box for flowers, food and herb seeds ready to sow each month… Curious? Come check out all of this month’s options!
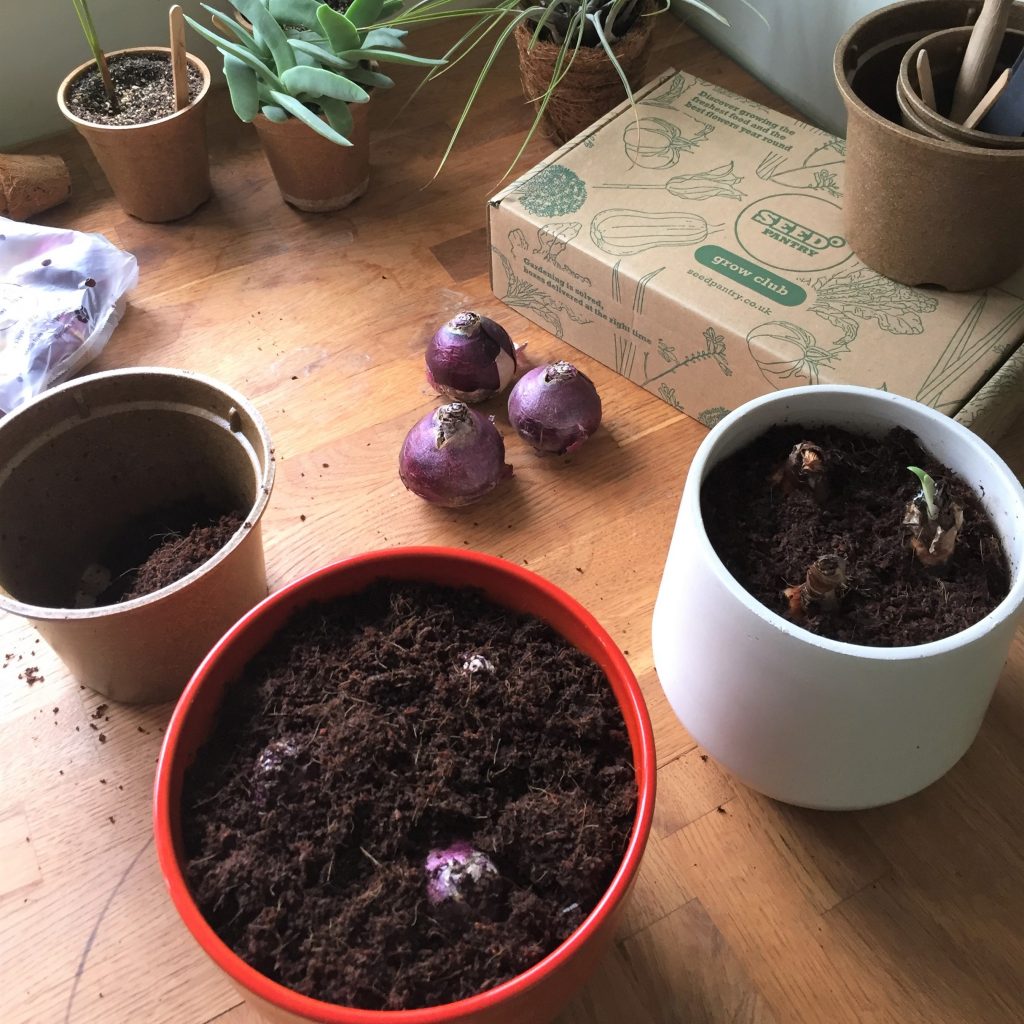
Autumn is the time for planting bulbs in the garden, daffodils, tulips, hyacinths, iris and crocus are all popular in Grow Club boxes now. Whilst you’ve been busy planting bulbs outdoors in the garden, it’s a great idea to pot up and grow flower bulbs indoors too!
So what is ‘forcing’ and what are ‘prepared’ bulbs?
A ‘prepared’ bulb is one that has been pre-chilled so that it will flower indoors out of season, only 8-10 weeks after being planted. The cold period mimics winter time and the ‘chilling’ period they need; Tricking the plant into thinking that it’s Spring time out of season! Time the planting right, and you can use your flowers as a stunning, fragrant home-grown Christmas centrepiece!
‘Forcing’ a bulb into flower sounds rather mean, but when you think about it you’re actually putting your bulbs up in a 5 star hotel complete with central heating and a watering-on-demand sort of room-service. Asking for a bloom out of season in return seems rather reasonable, don’t you agree?
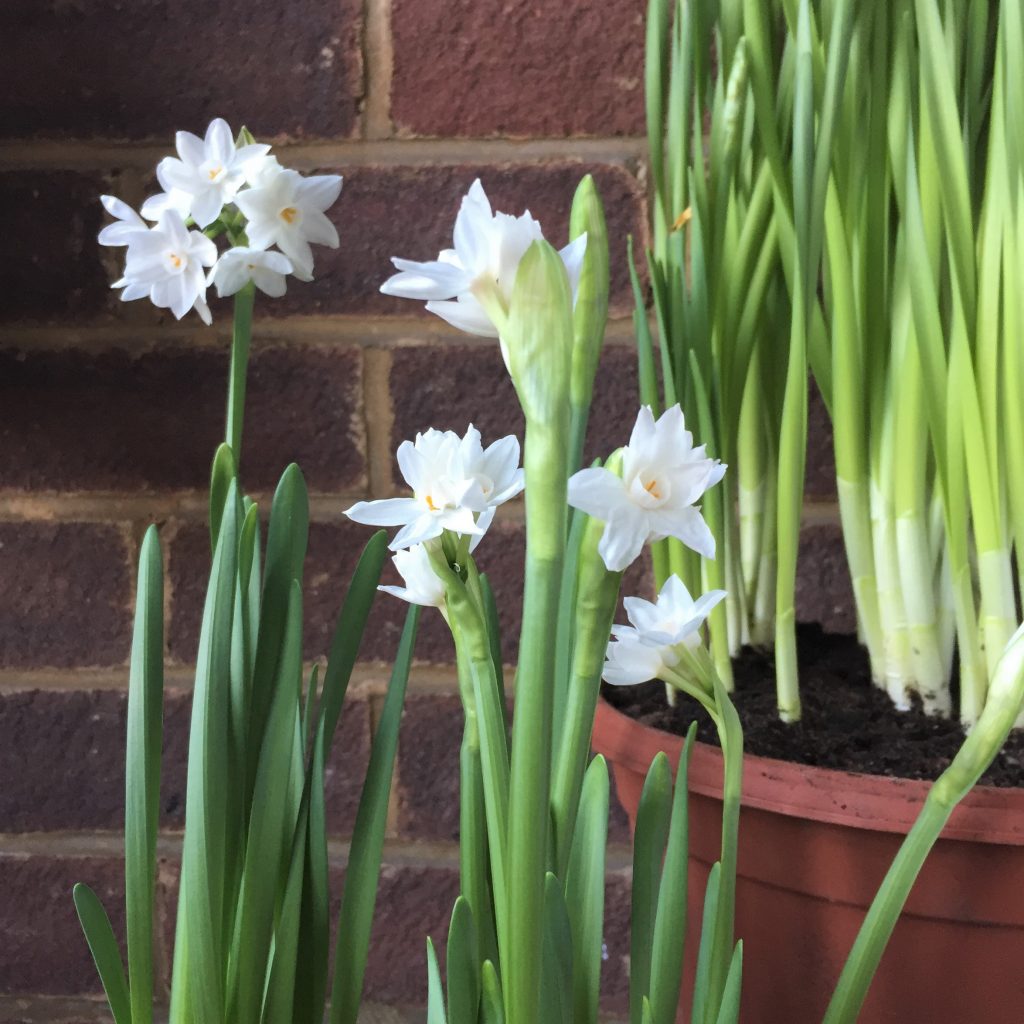
Narcissus papraceus
Grow Narcissus papyraceus – ‘Paperwhite’
Perfect for newbie gardeners Narcissus papyraceus (a.k.a. the ‘Paperwhite’ daffodil) is a fast and easy, fragrant indoor pot plant with delicate white flowers. They’ll make a beautiful centrepiece for Christmas, or cheer up any windowsill on a dark winters day.
How to do it
Plant several bulbs in each pot, pointy end up, with the tip of the bulb just below the surface. Any multi-purpose compose will do.
Water well and leave in a cool, shady room for 3-4 weeks. There’s no need to cover these.
After 3-4 weeks place on a warm, sunny windowsill and wait. They should bloom 8 weeks after first planting.
If the plants get a bit lanky, lend them a hand (or stick) to keep them upright.
Once your ‘Paperwhites’ have flowered, allow them to die down in a frost-free place and then plant them in the garden in a sheltered, sunny spot. Narcissus ‘Paperwhite’ aren’t hardy in some parts of the UK, so if you’re a Northerner you may want to allow them to dry off and store them to be replanted in containers later in the year.
Hyacinthus orientalis ‘China Pink’
Grow prepared Hyacinthus orientalis
Otherwise known as ‘Grape hyacinths’, orientalis will also only take a short while to bloom. Planting these beautifully fragrant flower bulbs indoors during October or early November will see you with flowers for Christmas and New Year!
How to do it
Select a container deep enough to hold single or multiple bulbs and add a 3/4cm layer of well-watered bulb fibre or Seed Pantry grow medium to the pot.
Next, plant and gently firm down the bulb/s. Fill around them with growing medium, leaving the tip of the bulb showing by 1cm.
Place pots somewhere cool and exclude any light: a garage, shed, dark cool cellar, cupboard, or a place on cool floor inside in a cardboard box.
Inspect the bulbs each week to ensure the grow medium isn’t drying out or the bulbs haven’t pushed themselves out – firm back in if so.
Your first leaves should be visible early December. Then place pots in a cool shady room. Leaves will green up and start to reveal the flower bud too!
Wait until the flower bud is clear of the leaf tips and place wherever you want to display them!
Top tip
You can also grow hyacinths using a glass vase, known as a bulb vase. The bulb should be slightly smaller in diameter than the vase so that it sits snugly. The steps are just as easy when growing them in this way too!
Fill your hyacinth glass with water to the neck, just below where the bottom of the bulb’s base will sit. Place the bulb tip side up in the top, being careful that it’s base doesn’t quite touch the water.
Leave your vase in a cool, shady place for 6 weeks until the roots start to form.
When the main shoot is around 7-10cm tall, move the glass into a sunny position.
Turn the glass a little every few days to prevent the plant growing lopsided, as they’ll grow towards the light. Top up the water every now and again to keep the water level stable.
After flowering
Once your hyacinths have flowered, allow them to die down before planting them in the garden at a depth of twice their own height.
Here at Seed Pantry we’ve made life easy and sourced only the best prepared indoor bulbs for you… available in the Grow Club and Seed & Bulb shop now!
Seed Pantry Team 🌼
#SeedPantryGrowClub
WIN a lucky-dip addition to your next box by sharing your plant pictures with us on Instagram. Use the hashtag #SeedPantryGrowClub or tag us @seedpantry to enter.
Subscribe to the Grow Club box for flowers, food and herb seeds ready to sow each month… Curious? Come check out all of this month’s options!
This Autumn in the Grow Club, we have gone all-in on fabulous ornamental onions, and have an amazing range of new and classic bulbs to choose from!
Allium hollandicum ‘Purple Sensation’ and ‘Ambassador’
Alliums are stunning unique flowers that no other quite compares too. Their large pompoms make them sensational additions to any garden adding structure and form. Pair that with the fact they come in gorgeous decadent blues, purples and stylish whites with star shaped flowers, they are a favourite of choice for all our Grow Club members. Not to mention they’re a favourite with our lovely honeybees, bumblebees and butterflies too!
Here’s a quick planting and care guide for your Alliums! 💐
1. Before planting, make sure to choose a well-lit area of the garden where the plants are likely to get plenty of sunlight. Also make sure you know how tall the alliums will grow, as the difference in size between one variety to another can be drastic. Best planted in well-drained soil, as they do not like heavy, clay or damp soil.
2. Planting depth is important for alliums as their tall stems need support to stand upright when fully grown. Check the required depth of your bulbs with the Seed Pantry guides, before planting, but in general, they need to be planted around 3 times the height of the bulb.
3. Spacing alliums correctly is equally important as the larger types require far more space in order to grow well. Plant smaller growing alliums 7-10cm apart, while the taller ones need at least 20cm between each bulb. If you are growing in pots make sure that they are deep enough to give plants the space needed so that they get enough water – often 40cm deep or more is great for containers.
4. Place your bulbs in the space pointy end up and simply cover the bulb with soil, give them a good drink of water and wait for the magic to happen! Alliums are so easy to grow, they make a very stylish display and the bees love them too!
Alliums in Garden Design
White Alliums used as a single colour pallet look beautiful.
There aren’t many plants that can be considered dainty AND bold, however smaller Allium flowers certainly fit the bill. These flowers will stand out wherever you plant them, their tall pompom like heads makes them immediately eye-catching in any garden display and are perfect for planting amongst flowers and green perennial foliage. They come in such a variety of colours, heights and sizes and once those summer blooms have faded their impressive structural seed heads will continue to spark interest!
Join the Grow Club, add some Alliums to your Grow Club box this month or treat your garden to a few ornamental Onions at the Seed Pantry Allium shop!