So you’ve successfully grown basil in your Grow Pod 2… what better way to use it than making your own pesto? No fancy expensive ingredients needed; Here is our variation on the classic pesto recipe.
Don’t feel confined to pesto pasta! This versatile basil pesto recipe is great for sandwiches, added to salads, alongside plain-cooked fish, smeared over roasted vegetables, dolloped and stirred into soup or as a simple dip with crudités. You can use other herbs in pesto too, mint works brilliantly, as do stronger herbs such as sage or thyme, although these are best combined with parsley so they don’t overpower the more subtle flavours in the sauce. If you fancy giving other herbs a go, check out our Top 10 best herbs to start growing.
Ingredients:
– 50g breadcrumbs – 50g basil, leaves only (or 25g each Basil and Parsley) – 35g strong cheddar, grated – ½ garlic clove, peeled and chopped – 100-150ml rapeseed or olive oil – A good pinch of sea salt and black pepper
How to do it
Preheat the oven to 180°C/Gas Mark 4. Scatter the breadcrumbs on a baking tray and bake for about 10 minutes until dry and golden, checking them frequently towards the end as they burn quite quickly. Tip on to a plate and allow to cool.
Place the toasted breadcrumbs into a food processor, along with the basil, parsley, garlic and cheese and blitz to a paste.
With the machine running on low speed, slowly pour in the oil until you have a thick purée.
Scrape your pesto into a bowl, and season to taste with a little salt and pepper.
Variations
Try replacing the breadcrumbs with toasted pine nuts or walnuts. Walnuts can be lightly toasted in an oven preheated to 180°C/Gas mark 4 for 5-8 minutes. For the pine nuts, place them in a dry frying pan and toast over a medium heat for a few minutes, tossing frequently. One they’ve turned golden brown, remove them from the pan to stop them from burning and leave to cool.
WIN a lucky-dip addition to your next box by sharing your plant pictures with us on Instagram. Use the hashtag #SeedPantryGrowClub or tag us @seedpantry to enter.
Subscribe to the Grow Club box for flowers, food and herb seeds ready to sow each month… Curious? Come check out all of this month’s options!
Autumn is the time for planting bulbs in the garden, daffodils, tulips, hyacinths, iris and crocus are all popular in Grow Club boxes now. Whilst you’ve been busy planting bulbs outdoors in the garden, it’s a great idea to pot up and grow flower bulbs indoors too!
So what is ‘forcing’ and what are ‘prepared’ bulbs?
A ‘prepared’ bulb is one that has been pre-chilled so that it will flower indoors out of season, only 8-10 weeks after being planted. The cold period mimics winter time and the ‘chilling’ period they need; Tricking the plant into thinking that it’s Spring time out of season! Time the planting right, and you can use your flowers as a stunning, fragrant home-grown Christmas centrepiece!
‘Forcing’ a bulb into flower sounds rather mean, but when you think about it you’re actually putting your bulbs up in a 5 star hotel complete with central heating and a watering-on-demand sort of room-service. Asking for a bloom out of season in return seems rather reasonable, don’t you agree?
Narcissus papraceus
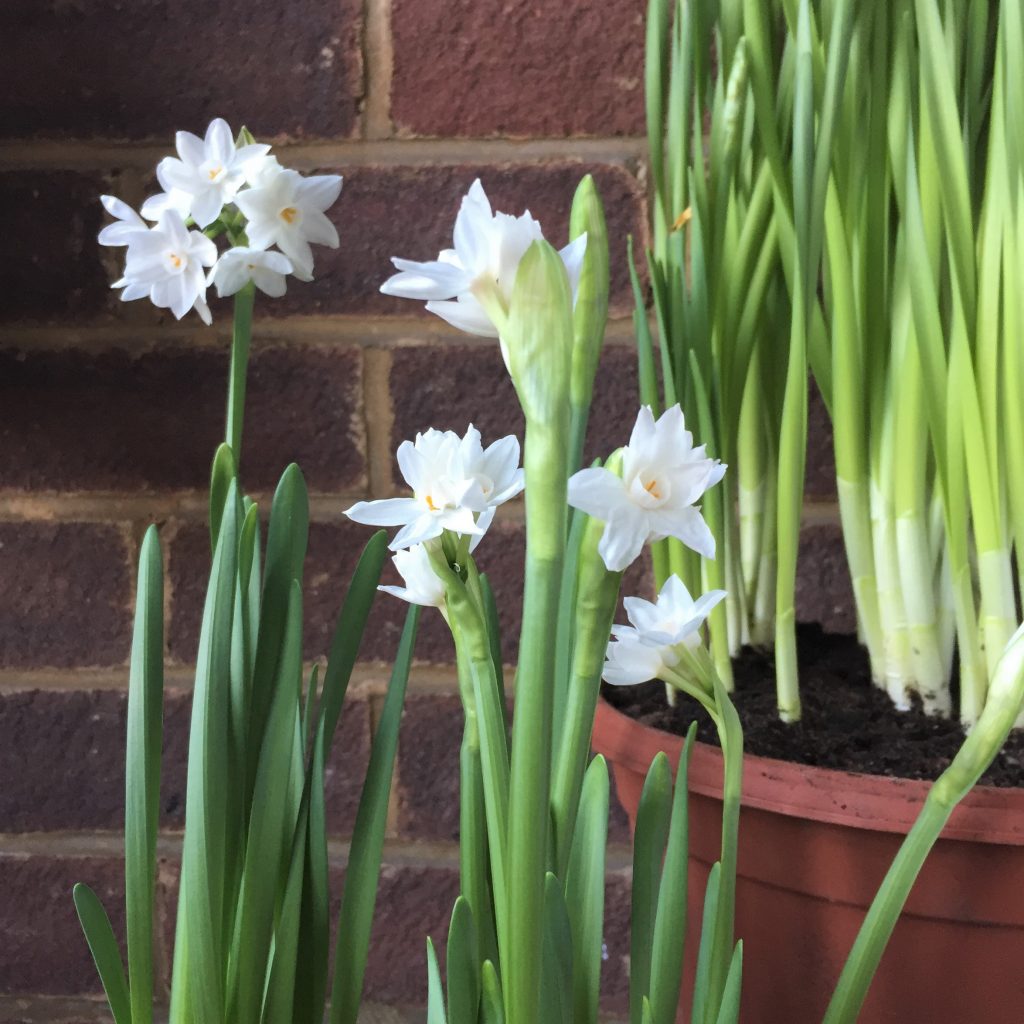
Grow Narcissus papyraceus – ‘Paperwhite’
Perfect for newbie gardeners Narcissus papyraceus (a.k.a. the ‘Paperwhite’ daffodil) is a fast and easy, fragrant indoor pot plant with delicate white flowers. They’ll make a beautiful centrepiece for Christmas, or cheer up any windowsill on a dark winters day.
How to do it
Plant several bulbs in each pot, pointy end up, with the tip of the bulb just below the surface. Any multi-purpose compose will do.
Water well and leave in a cool, shady room for 3-4 weeks. There’s no need to cover these.
After 3-4 weeks place on a warm, sunny windowsill and wait. They should bloom 8 weeks after first planting.
If the plants get a bit lanky, lend them a hand (or stick) to keep them upright.
Once your ‘Paperwhites’ have flowered, allow them to die down in a frost-free place and then plant them in the garden in a sheltered, sunny spot. Narcissus ‘Paperwhite’ aren’t hardy in some parts of the UK, so if you’re a Northerner you may want to allow them to dry off and store them to be replanted in containers later in the year.
Hyacinthus orientalis ‘China Pink’
Grow prepared Hyacinthus orientalis
Otherwise known as ‘Grape hyacinths’, orientalis will also only take a short while to bloom. Planting these beautifully fragrant flower bulbs indoors during October or early November will see you with flowers for Christmas and New Year!
How to do it
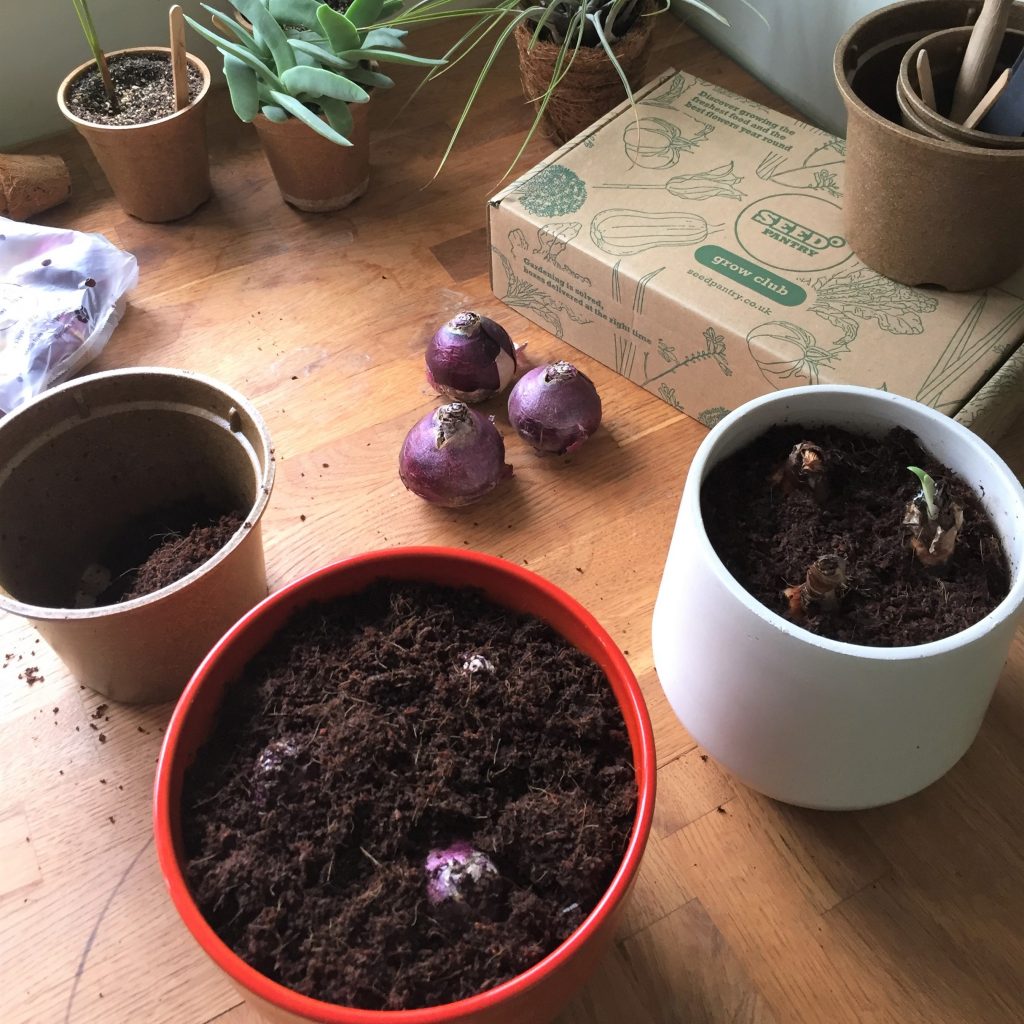
Select a container deep enough to hold single or multiple bulbs and add a 3/4cm layer of well-watered bulb fibre or Seed Pantry grow medium to the pot.
Next, plant and gently firm down the bulb/s. Fill around them with growing medium, leaving the tip of the bulb showing by 1cm.
Place pots somewhere cool and exclude any light: a garage, shed, dark cool cellar, cupboard, or a place on cool floor inside in a cardboard box.
Inspect the bulbs each week to ensure the grow medium isn’t drying out or the bulbs haven’t pushed themselves out – firm back in if so.
Your first leaves should be visible early December. Then place pots in a cool shady room. Leaves will green up and start to reveal the flower bud too!
Wait until the flower bud is clear of the leaf tips and place wherever you want to display them!
Top tip
You can also grow hyacinths using a glass vase, known as a bulb vase. The bulb should be slightly smaller in diameter than the vase so that it sits snugly. The steps are just as easy when growing them in this way too!
Fill your hyacinth glass with water to the neck, just below where the bottom of the bulb’s base will sit. Place the bulb tip side up in the top, being careful that it’s base doesn’t quite touch the water.
Leave your vase in a cool, shady place for 6 weeks until the roots start to form.
When the main shoot is around 7-10cm tall, move the glass into a sunny position.
Turn the glass a little every few days to prevent the plant growing lopsided, as they’ll grow towards the light. Top up the water every now and again to keep the water level stable.
After flowering
Once your hyacinths have flowered, allow them to die down before planting them in the garden at a depth of twice their own height.
Here at Seed Pantry we’ve made life easy and sourced only the best prepared indoor bulbs for you… available in the Grow Club and Seed & Bulb shop now!
Seed Pantry Team 🌼
#SeedPantryGrowClub
WIN a lucky-dip addition to your next box by sharing your plant pictures with us on Instagram. Use the hashtag #SeedPantryGrowClub or tag us @seedpantry to enter.
Subscribe to the Grow Club box for flowers, food and herb seeds ready to sow each month… Curious? Come check out all of this month’s options!
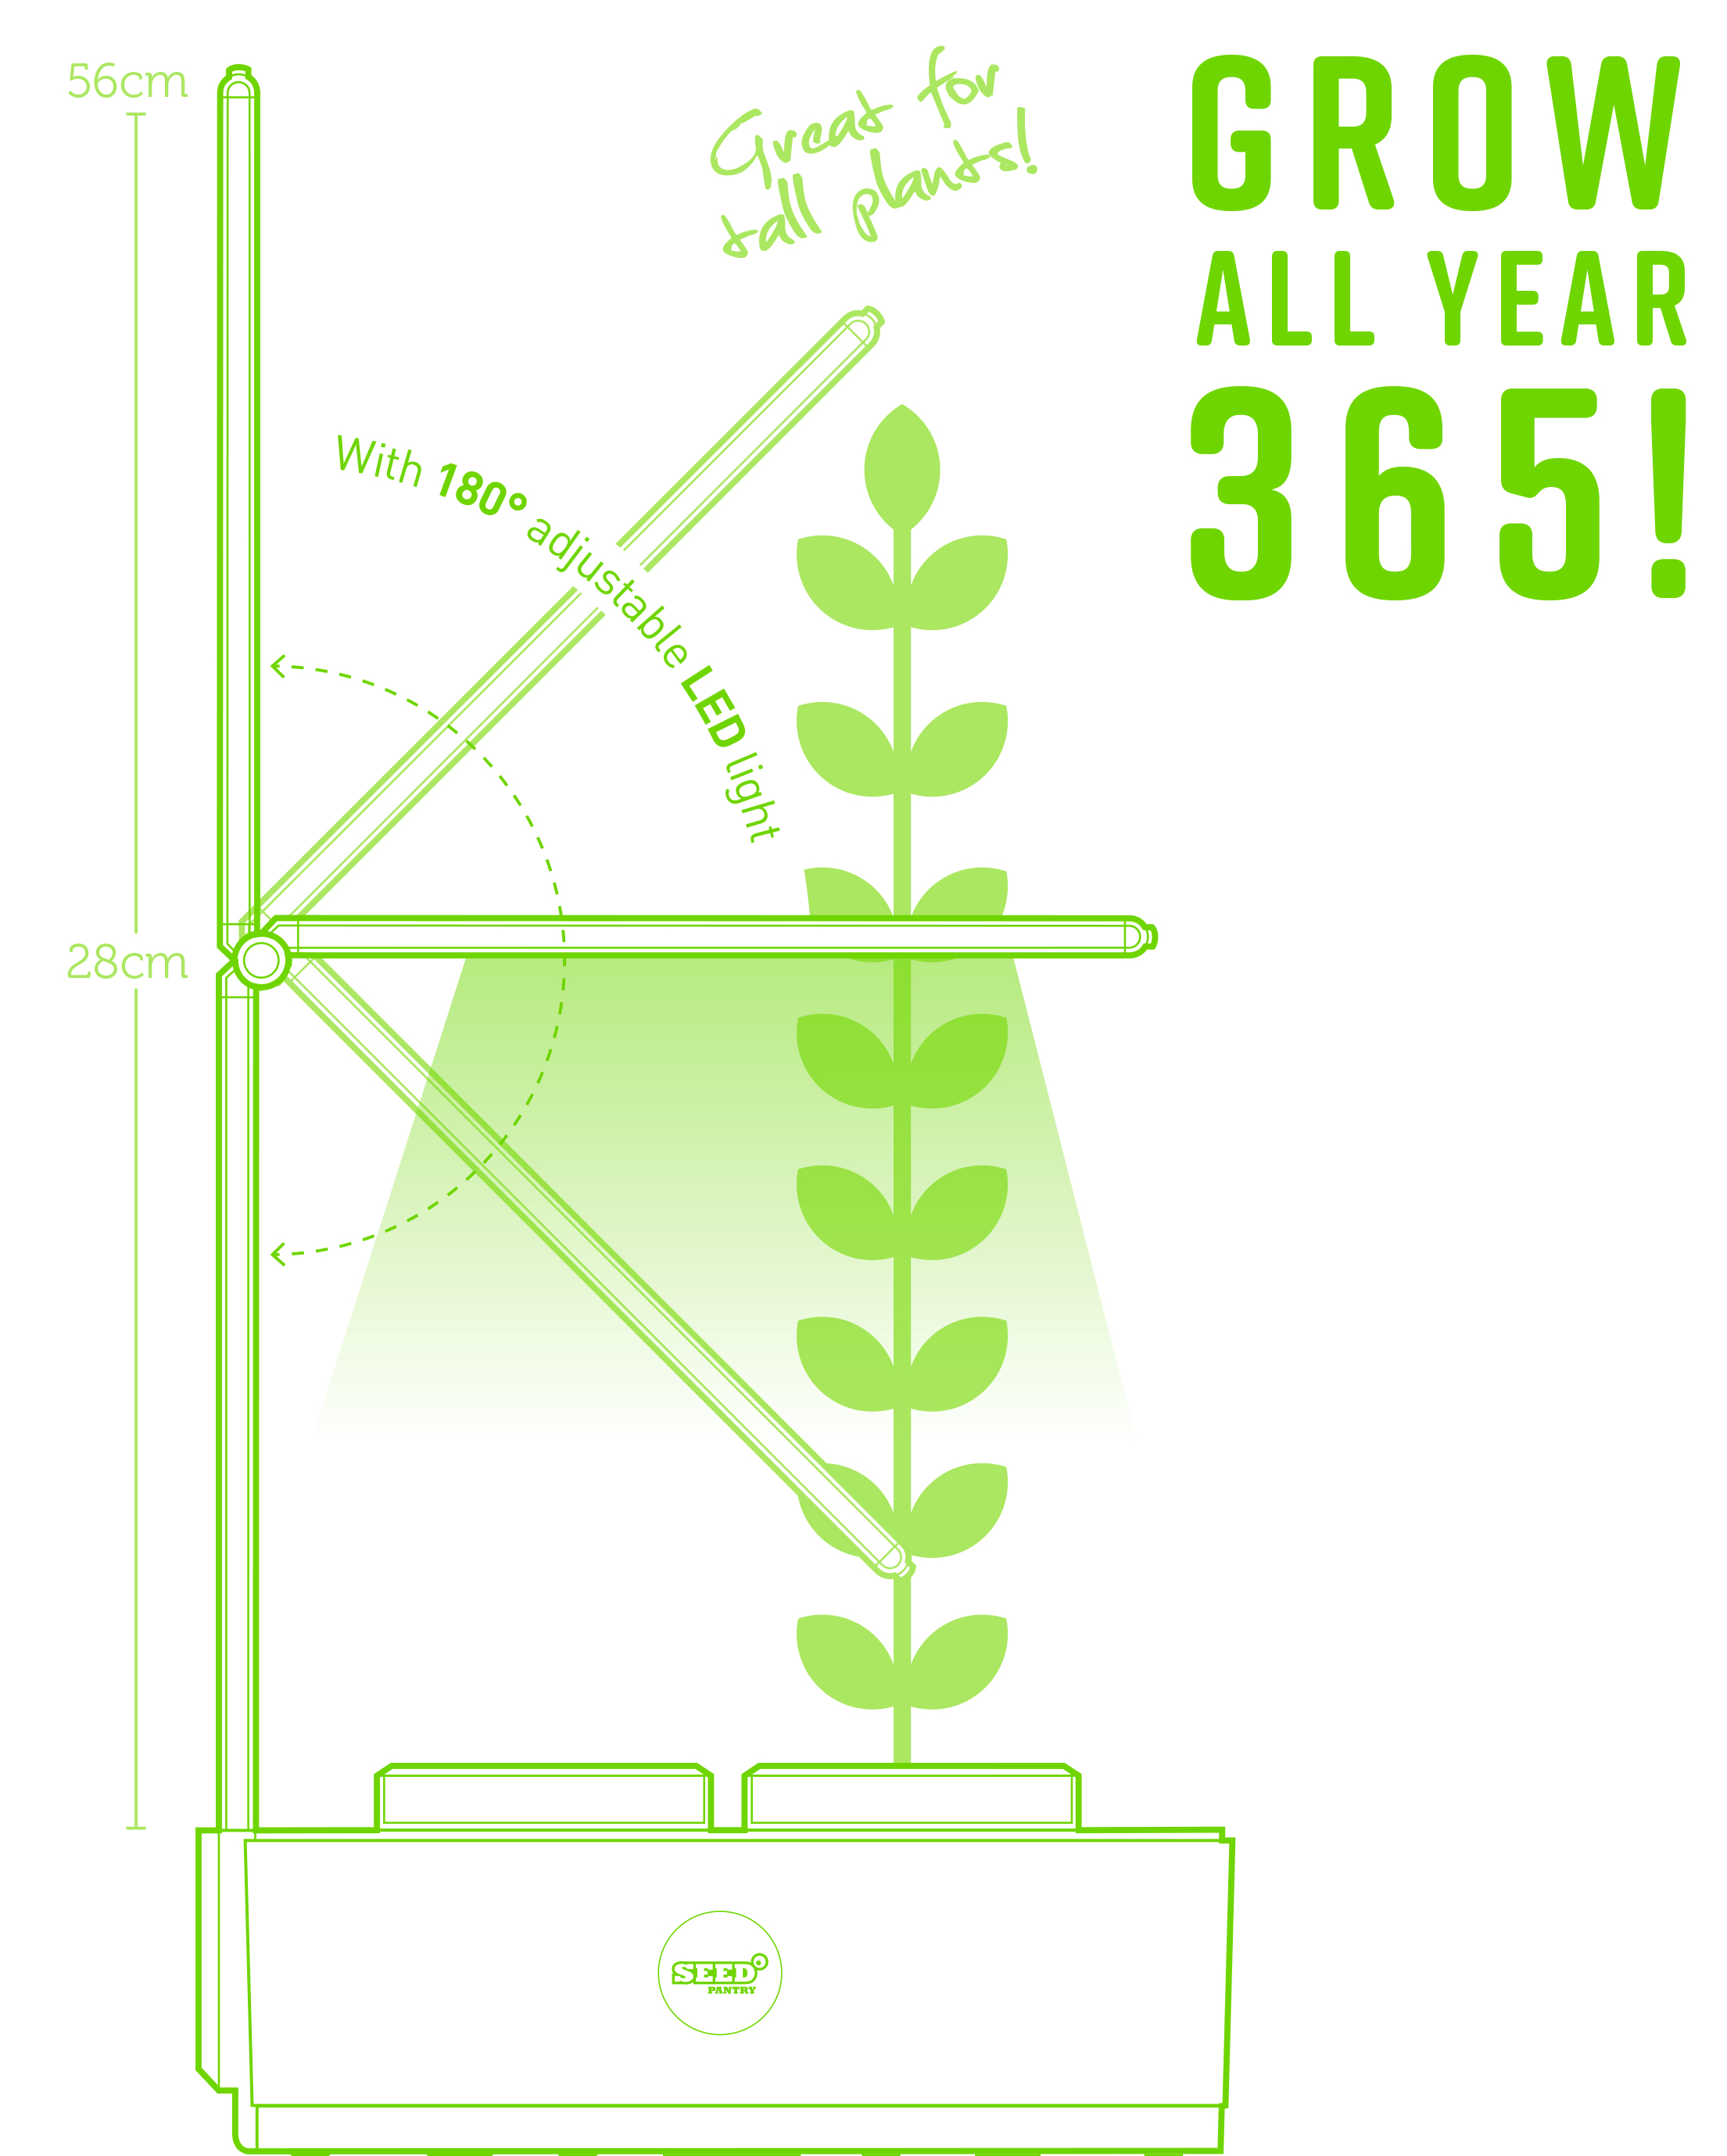
The Seed Pantry Grow Pod 2 is designed to produce ultra-fresh food indoors with no soil, no mess and hassle free. The Grow Pod 2 now with LED grow light is a smart automated system for growing plants quicker, even in darker spaces, year round.
You don’t need to be a gardener or green fingered, the Seed Pantry grow pod 2 does the work for you! It’s perfect for growing herbs, salads, flowers and fruiting vegetables, like cherry tomatoes or chillies, in your kitchen, on your desktop, anywhere really!
If you love cooking, knowing where your food comes from, the grow pod 2 is essential for having the freshest ingredients ready to pick.
Grow ultra-fresh ingredients essential for cooking
Automated growing, tells you when to water
LED grow light with ON/OFF timer feature
Red/Blue light spectrum for strong healthy plants
Fast growing hydroponic system
Optional ‘get started’ grow pack includes seeds and grow medium
Advanced growing medium with nutrients
Grow nutritious, pesticide free crops & flowers too